Hi again, everyone. Last time we spoke about the usefulness and principles of the dot blot technique. This time, we'll go over what could go wrong when performing the technique. In particular, what to do to avoid low-signal, high-background and non-specific binding.
At Which Steps Can the Experiment Go Wrong? How Can I Avoid Mistakes?
Sample Prep
A reason for seeing a lack of signal could be lack of protein and this can come from poor sample prep. When homogenizing your sample, be sure to do so on ice (and keep your sample cold or frozen until use) using an appropriate ice-cold buffer (RIPA is great for isolating membrane bound, cytoplasmic and nuclear proteins from animal tissue) that contains both protease and phosphatase inhibitors.
If you know your protein is in a particular compartment (nuclear vs cytoplasmic), be sure to use lysing conditions that enrich for proteins in that compartment. Type of detergent, pH, salt concentration and temperature all can have an effect on your protein yield.
Handling the Membrane
Remember that the membrane is sensitive to protein. Wear gloves and use tweezers or forceps to handle to edges of the membrane so as to not unintentionally transfer protein to the membrane.
Blocking
The initial blocking of the membrane is very important. Underblocking (too little time in the blocking buffer) can lead to non-specific binding by the primary and secondary antibodies and cause very high background. Overblocking (too much time in the blocking buffer) can lead to poor binding and trouble with detecting your POI.
I usually block for 1 hour. Typically, since we use the Odyssey system, we also use the proprietary blocking solution provided by Licor. However, I've used my own buffer (5% BSA in TBS-T, with 0.1% Tween20) when running low and it usually works just as well.
Washing
Proper washing is necessary in order to be sure that the signal you observe is due to binding of your POI instead of improper removal of excess antibody.
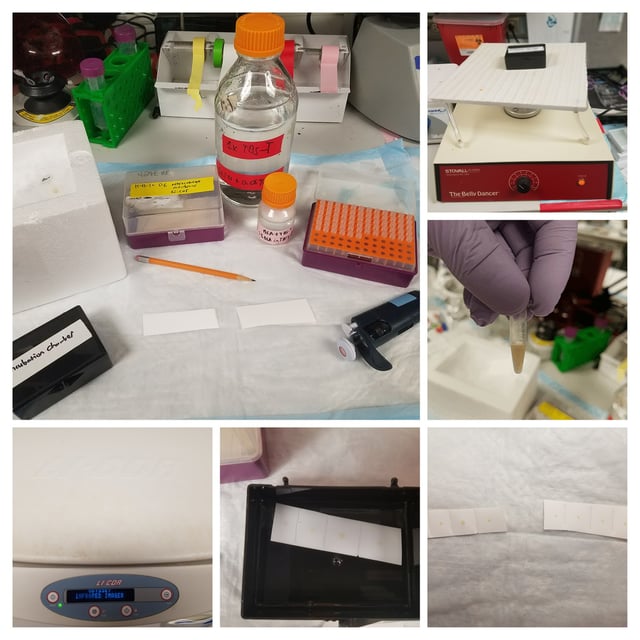
To wash after incubating with primary or secondary Ab, I tend to rinse the membrane twice with 1X TBS-T (literally just adding the buffer and then removing it immediately), followed by a 15-min wash combined with gentle agitation (we use a "belly dancer" as shown in the above image) and then 2X 5 mins washes also with gentle agitation. After doing the final TBS-T wash, I wash with straight 1X TBS for 5 mins and then leave the membrane in 1X TBS until I image (usually within a few mins). I find this works well.
What Are Some of Things to Watch Out For and What Is the Key To a Successful Experiment?
If performing a dot blot for the first time, or just with a new antibody, it’s best to do serial dilutions of both your sample and your antibody. This can help you determine the optimal antibody and sample concentrations to use for your dot blot and reduce the background.
Recall what was discussed in the previous post: the dot blot is basically the little brother of western blotting and so troubleshooting that applies to westerns can also apply to dot blots. Taking the time to try various conditions can help avoid you some headaches in addition to saving you the trouble of needlessly repeating an experiment!
In Closing
Hopefully, you’ve found this brief article series useful in informing you on the dot blot technique.
Remember to always carefully consider the purpose of your experiment before you start. If simply checking for presence of your POI, then the dot blot is the way to go as it will save you time and materials. If you need more sensitive quantification or if you need to extract and purify the POI for other downstream applications, then a Western might be more appropriate.
As the antibody itself plays a crucial role to a successful dot blot, be sure to review published data before selecting an antibody.